Hi everybody,
I started a new blog at a different address. It's a beauty, fashion & health blog, but it revolves a lot around performers, dancers, and stage makeup. Of course there will still be a lot of regular tutorials and such, but there will be a lot of stage makeup tutorials, rehearsal tutorials, leotard reviews, pointe shoe discussions, and OOTD- for theatre rehearsals. Hopefully if you like Inner Beauty Out, you'll like Ballerina Beauty and will subscribe! Thanks everyone!
www.ballerinabeauty.blogspot.com
xoxoxo
Anna

Wednesday, June 20, 2012
Thursday, May 10, 2012
Match Your Mood: Rainy Day Tutorials
When I think of Spring, I think of sunny, warm, bright colors, and I tend to stock up on those kinds of colors for my makeup. But there are always those days when you wake up and it's pouring outside. Now personally, I don't mind these days. In fact, I cherish it because I think rain is relaxing. But bright colors don't really reflect my mood on these dark days. So I had the idea to show you the rainy day makeup I wear:


 7. Finally I want to have a nude-y pink lip so I'm going to first put my Revlon Lip Butter in Creme Brulee, and then my NYX Goddess of the Night Lipgloss in French Kiss. It's a nude pink combo and I adore it!
There you have it :) How does makeup reflect your mood? Tell me in the comments!
xxoo
Anna
It's not just dark, but it's fun to wear and really edgy but also very pretty. Plus it's super easy! It just consists of a purple eyeliner, a brownish-rosy cheek and nude-pink lip.
Let's jump right in!
These are the items I'm using:

Fun!
1. I'm going to be using a really shimmery off white color as an all over the lid color:

This will go on as a nice contrast to the dark liner we are going to put on, and it's just a nice base.
2. Next is the gel eyeliner from MAC in Macroviolet! With a thin line on top, you can wing it out a teensy bit. Now draw a thin liner on the bottom of the eye and connect it to the wing. Finally line the water line of your eye to thicken it up.
3. With either a smudge brush or an eyeshadow applicator you get in palette, smudge out the wing so it's a little softer and not as clean and perfect.
4. Now with a pencil brush dip it in a white color (you can use the same color as your base or a different one) and place some into the inner corner and under your brow. My reasoning for this is because even though it might be gloomy out, and your makeup is pretty dark, so I want to still draw light towards your eyes.
5. The same goes for this step: curl your lashes! And of course, apply your favorite mascara.
6. I don't really want a bright pink cheek, so a little more brown will still look great but it won't be as harsh and bright.

There you have it :) How does makeup reflect your mood? Tell me in the comments!
xxoo
Anna
Saturday, May 5, 2012
Red, White, and Beauty- A Memorial Day Tutorial!
Ok. I couldn't resist.
I know, I know. Memorial day is weeks away. But I got really excited for a Red, White & Blue Tutorial...I just couldn't wait!
So here is what it will look like:
 I know, awkward picture. Anyway, this is a look with a blue eye liner and a very pretty redish pink lip. It was tons and tons of fun to create :)
Lets jump right in!
1. After doing all that necessary moisturizer, foundation and concealer (how ever you prefer to do your face makeup), I'm going to prime my eyes. Since this will probably be worn to a party or something, primer is important! You don't want your makeup to smudge :)
2. Now with my finger I'm going to put a color that I found in my Ulta Makeup Pallette....thing. I've had this for years, so if you don't have it, obviously it won't make or break this look. Basically you just want to put a silvery-blue color like this all over your lid:
 Don't mind my thing, it's a total mess!
3. Anyway, after this is all over your lid, take a blue-ish-white color and put this in your crease. I'm using another color from this pallete.


 7. Moving onto the cheeks. I wanted a slightly less pink blush for this look, mainly because I want to focus on the eyes and lips. For the cheeks I used Ulta's blush in "Flush". I actually got this in a huge bag of Ulta stuff during one of their "Buy $20 worth of stuff and we'll give you tons back!" sales. I'm really glad I did though, because I got my Voluptuous Volume Mascara with it. Anyway, I'm going to sweep this color on to my cheeks and a little higher up just make sure the color doesn't get to dark in one area.
 8. Finally we are at the best part! The reddish-coral lip :) I'm going to use my Sephora Brand Lipstick in the color "Sweet Embrace":

 If you build up this lipstick, it gets darker (as you can hopefully see in the swatch) and it looks even more red for the flag!
And there you have it. This is an amazingly fun look and even though Memorial Day is weeks away, it's still fun!
Also: look out for a Mother's Day Brunch tutorial!
Have a lovely weekend :D
xoxo
Anna
I know, I know. Memorial day is weeks away. But I got really excited for a Red, White & Blue Tutorial...I just couldn't wait!
So here is what it will look like:

Lets jump right in!
1. After doing all that necessary moisturizer, foundation and concealer (how ever you prefer to do your face makeup), I'm going to prime my eyes. Since this will probably be worn to a party or something, primer is important! You don't want your makeup to smudge :)
2. Now with my finger I'm going to put a color that I found in my Ulta Makeup Pallette....thing. I've had this for years, so if you don't have it, obviously it won't make or break this look. Basically you just want to put a silvery-blue color like this all over your lid:

3. Anyway, after this is all over your lid, take a blue-ish-white color and put this in your crease. I'm using another color from this pallete.
4. Once you've defined your eyes, you can move right into eyeliner. I'm using my Revlon Luxurious Eyes Eyeliner in Electric Blue. This is what it looks like!

It's an extremely bright blue, but it will look amazing. Just line the top of your eye and your waterline for a very wild but fun look.
5. Use your favorite shimmery white eyeshadow (I'm going to use just a plain white color in that palette) and place it into the inner corner and underneath the brow to bring lots of light to that area.
6. Now using your favorite mascara, curl your lashes and apply a few coats. I'm going for big, bold lashes that top off the look.


And there you have it. This is an amazingly fun look and even though Memorial Day is weeks away, it's still fun!
Also: look out for a Mother's Day Brunch tutorial!
Have a lovely weekend :D
xoxo
Anna
Wednesday, May 2, 2012
Recreate It: Emma Watson
I'm crazy for looking at different celebrity fansites and their photoshoots, and then trying the look on myself. One of my all time favorite celebrities is Emma Watson. I think her style is wearable, and she's just plain gorgeous. So when I stumbled across her at the Tribeca Film Festival I couldn't stop looking at the makeup and outfit in these amazing photos.


Pictures from here
Of course, my first thought was how could I blog about this? I thought I'd give a little makeup recreation (nothing too much like a full blown tutorial, but more of an overview) and try to find similar clothing to hers in these pictures.
She has dark eyes with a lot of light in the inner corner, with rosy cheeks and a pinkish-coral lip. It's edgy but very feminine at the same time!
After priming my lids, I'm not going to do an all over the lid color, but I am going to put a really nice matte dark brown color in the crease. I found this eyeshadow in my drawer and had no idea what brand it is, but I have a swatch of the general color below (along with my Mac Mineralized Skinfinish and an eyeliner I swatched for a different tutorial):

This shadow is the one all the way on the right. You can use any matte brown shadow you want though. I like the way this one looks because there is absolutely no shimmer and it's dark enough to blend with the eyeliner we are going to use and still look beautiful. Then I'm just go to do a cat liner with any black liquid liner and smuge it a teensy bit so it isn't too harsh. Then to bring light to the eyes I'm placing a teensy bit of my Mac Mineralized Skinfinish is Soft in Gentle in the inner corner on on my browbone. These skinfinishes are extremely sparkly, but really help bring light to my eyes.
Finally I'm going to put a nice amount of my ELF Studio Blush in Pink Passion on the apples of my cheeks and pair my Sephora Lipstick in Sweet Embrace with my Nars lipgloss in Albatross. Albatross really doesn't have a lot of color, but it's shimmery and sparkly!
Now that the makeup is done, we get to move onto a recreation of the uique but stylish outfit she wore. Just saying, I probably wouldn't be daring enough to wear all of these pieces together, but I think seperately they are adorable! The first piece is the blue floral skirt. I found a really pretty one from Forever 21. The color is brighter and the print is more paint stroke-y than floral. I have other options, but this was definitely my favorite.
Picture from Forever 21, Get it for $11.06
Other options include these skirts (all from the Forever 21 website)
Left: $17.80 Right: $15.80
Next is the similarly printed top, which is black and white. When I saw this, I immediately thought "Urban Outfitters!"
I looked on their website and I found the closest to a black and white print. It's stripes, but I thought it had a similar cut and would look vey interesting with this type of skirt. If you aren't up for a printed skirt with it, a plain bright one would look great too!

On top is a black fitted leather jacket. Now, Urban Outfitters actually has a really nice one that is much less than their usual prices. This is actually only for $69!

Urban Outfitters pictures from here
There you have it! Have fun with this and have a lovely week! :)
-Anna
Saturday, April 28, 2012
Haul: Sephora, PacSun and More!
Over the last two weeks I've picked up a few things here and there, and decided to post one big, collective haul. At Sephora I picked up two things, at Mac I picked up three things, at PacSun I picked up four things.
I guess I'll just jump right into it!
First, from Sephora, I got a BareMinerals eyeshadow duo called "The Scenic Route". I love how gorgeously pigmented the green is. The white is pretty, but if used as more than a highlighted it doesn't look that lovely. Basically, I bought this for the green, and it totally paid off!
I found a great swatch of the colors here. (My camera won't pick it up)
Next, I got a really pretty lipstick from Sephora. It's called "Sweet Embrace". I tried it on, and I love it! It's not as pigmented as it looks from the package, but it still goes on beautifully. I would say it's more of a light rose in person. It looks darker from the picture.
Picture from here
Also, the packaging is ridiculously amazing! The cap seems to be magnetic. Love it!
Now I'm moving on to Mac. At Mac I got a Fluidline Liner in Macroviolet. Usually I don't get too colorful with my liners, but I love this, especially on brown eyes. It's a plum-y purple color, and it goes on smoothly and it's soooooo pretty!
Picture from here
Next from Mac I picked up my very first Mineralized Skin Finish in Soft & Gentle. I won't go into too much detail, since these are very hyped up, but I still love these so much! It's a beautiful highlighter.
Picture from here
Finally from Mac, I picked out this beautiful lipstick in Pink Nouveau. I love this color! I usually don't love light pink lipsticks, but I still love this color because it doesn't wash me out.
Picture from Here
Now onto the clothes! From Pacsun I got Volcom "Frochickie" Shorts in white. I'm planning to wear this to a casual dinner at the beach, where it's not dressy but they do look nice. They aren't denim, which I love! They also come in black, but I prefer the white.
Check them out and buy them here!
Next I just picked up another pair of dark wash denim shorts that I wear all the time in the summer. There aren't anything special, but I figured I'd throw them in here anyway!
Check them out and buy them here!
Onto the fun stuff! My favorite pick was my dress that I adore! It's an off-white color with a colorful floral print and a deep v-neck. My favorite part is arguably the back, though. I can't get a great picture of the back, so I'll just link the site as usual and you can look at it yourself. The back is a halter, and a triangular cutout! It's so pretty.
Check it out and buy them here!
Finally I grabbed a pretty patterned shirt. I like the back, the front and the colors! Paired with the white shorts, I love it!
Check it out and buy it here!
And that's it! I can't wait to show any mroe hauls, and I bet you get more of a insight into what my style is. Thanks for reading!
xoxo
Anna
Anna
Thursday, April 26, 2012
Perfect Sunny Skin!
If you go out into the sun, you've probably heard your mother tell you to put on sunscreen or else you'll get skin cancer. And I'm positive we've all felt the effects of a pink sun burn. So, as the air gets warmer, I'm going to show you how to protect your skin from the sun, and if you do get a little (or a lot) pink, how to keep it healthy.
Keeping your skin healthy and protected is just as important as using, say, a heat protectant for your hair, or a top coat on your nails. Every day I use a sun screen under my concealer and foundation to protect my skin, whether I go inside or outside.
The sunscreen I've been using is Neutogena's Ultra Sheer Dry Touch Sunblock in SPF 30. I love this because it dries nicely and protects my skin perfectly!
Picture from Neutrogena's Website
Using this is usually fine, but if you're planning on being at the beach or out in the sun all day, you might want to grab a 100+ SPF, especially if your job or hobby requires you outside often.
Every once in a while, you might miss a spot (I always miss my ears) and you do get sunburnt.
I have some tips for treating it:
1. Always wait at least two hours for the burn to cool before putting anything on it.
2. If you have to go out afterwards, skip the heavy creams on your face. You'll feel terrible all night because of how hot your face will be.
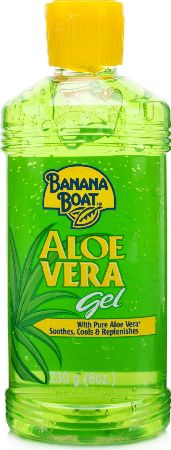
3. Once your face has cooled down, dab a little Aloe Vera Gel onto your burns to cool it down even more and help it heal.
4. Next time, build up your sunblock to protect yourself from burning again! :D
If you're interested in investing in an Aloe Vera, you can usually find any sort of brand aloe vera in the nearest drugstore near your vacation destination, but if you're looking for something to base it of off, you can usually buy this Banana Boat one in Target or CVS.
Picture from Here
Remember, stay out of the sun as much as possible :)
Have a great rest of the week and weekend!
Tuesday, April 24, 2012
Trending Trends: Spring Color Pops!
As you've probably seen, pops of color in a nude or black look is very on trend. Whether the color is in your lip stick, your earrings or your shoes, bright neons or even pastels are seen almost everywhere I go! Don't believe me? Check it out:

(Above left: MissGlamorazzi's Neon Pop Tutorial Above Right: Glamour Magazine's Jen Weinberg)
See? I'm here to show you fun clothing ideas for this trend! (Note: All of the links to the product are hyperlinked)


(Above left: MissGlamorazzi's Neon Pop Tutorial Above Right: Glamour Magazine's Jen Weinberg)
See? I'm here to show you fun clothing ideas for this trend! (Note: All of the links to the product are hyperlinked)
Look #1
Pair this little black dress (Forever 21, $19.80) with a bright pair of heels (Forever 21, $24.80) for a night out!
Look #2
Wear a fun black romper (Urban Outfitters, $59.00), but go for a yellow belt (Forever 21, $6.80) instead of a white one!

Look #3
On top of a plain black tee (Hollister, $13.65), add a pair of pretty fuschia shorts (Forever 21, $9.80) and a cool pink scarf (Forever 21, $8.80)
And there you have it! Pick out your favorite color and pair it with any sort of black (or even white) shirt, dress or romper! I love this trend and can't wait to see what else spring has in store!
xoxo Anna
Follow me on Twitter: innerbeautyout1
Follow me on Youtube: InnerBeautyOut21
Don't forget to subscribe to this blog!
Saturday, April 21, 2012
Panem Tutorials: Clove

On to #2 in my Panem tutorials series! Next is the beautiful badass Clove, played by Isabelle Fuhrman. For the interview with Cesar Flickerman, she has bright orange-y cheeks, winged liner with silver shadow, and a gorgeous orange dress!
1. Let's start with makeup, as usual. I'm going to go in with my concealer to cover up any blemishes.
2. Now I'm going to pick up my MAC Tres Cheek Collection Blush in Modern Mandarin. Now, on my skintone this can be extremely orange if you layer it too much. So I'm going to dust it on lightly to the apples of my cheeks.
Also: I used the Tres Cheek Blush Immortal Flower blush in my last tut, so if you are curious to see swatches, Amarixe has really great quality ones in her blog post! I would take them myself, but the quality probably wouldn't be as nice. Here :D- Amarixe's Blog
3. Moving right on into the eyes, I'm going to start by priming my eyes, and then all over the lid I'm putting the top left, silvery color in my Revlon 16-Hour Colorstay Palette in Siren. With a pencil brush, I'm going to bring the color underneath my eyes and into the inner corner.
4. To add more color to inner corner and underneath the brow I'm placing my Nars Shimmer Eyeshadow in Tibet.
5. Now I'm taking my Sonia Kashuk Dramatically Defining Long Wear Gel Liner and using a bent liner brush to apply it thickly on my upper lash line. I'm going to wing it out, but instead of upwards, but downwards.
6. My favorite part comes next! I'm going to apply my Revlon Beyond Natural Fake Lashes, but I'm going to cut them so they only go on the outer corner.
7. Once they are applied, I'm just to curl them and apply my Lash Icon Macara from Ulta to keep them more defined.
8. Now I'm just going to put on my Evolution Revolution Lipglass from Mac all over my lips.
And there you have it!
To top off the look, I'm going to show you a dress similar to this one.
Here is the dress from Macy's! It's a little more toned down color wize, but I think it's adorable!
And there you have it! Look for Glimmer, Katniss and more coming soon!
Tuesday, April 17, 2012
Panem Tutorials: Foxface
Hi everyone! I'm going to do a series of tutorials inspired by the characters from the Hunger Games. For my first look, I'm going to show you how to do a look for Jaqueline Emerson- a redhead, singer and the actress who plays Foxface in the Hunger Games.
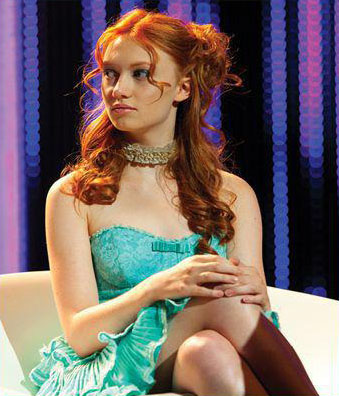
 I found a cute blue party dress similar to hers:
The look is for Cesar Flickerman's interview with her- all of the looks for tributes will be from the interview or parade (with maybe the exception of Katniss).
Let's start with Makeup!
1. Becuase this is the Capital, having a good complexion is important. I'm starting out with my Chanel Vitalumiere Aqua Foundation all over my face, and blending it in with a flat-topped foundation brush.
2. Now I'm taking my Nars Stick Concealer and I'm just brightening up my under eye circles and any blemishes I find on my face.
3. I'm skipping powder, but I'm going to go in and contour my cheeks with my Bobbi Brown Bronzer. This will define my face and match the brownish-blush on her face.
4. After bronzing, I just want to add a little more color, so I'm going to use my new MAC Tres Cheek blush in Immortal Flower. I love this blush, and I was super lucky to get one! Immortal Flower is my favorite. It's a peachy color, and I just want to add a teensy bit to the apples of my cheeks.
5. Next I'm going to take my MAC Mineralized Skin Finish in Soft and Gentle and just highlight my cheeks, to make them more shimmery.
6. Now onto the fun part: eyes! Of course, I'm starting with Urban Decay Primer Potion all over my lid.
7. Her eyes seemed to be very bronzey with a lot of blue eyeliner. I want the focus to be more on the crazy liner. So all I'm going to do is in my Maybelline Color Tatoo Creme Eyeshadow in Bad to the Bronze and put it all over my lids. I'm not afraid to do some crazy color mixing in order to get the "Capital" look.
8. I want simple shadow, so now I'm going to take my Revlon Luxurious Color eyeliner in the color Electric Blue. Starting with a thin line close to my lashes, I'm going to thicken it slowly. Now open your eyes wide. If the the bronze color still shows when you're eyes are open, thicken the liner.
9. Now I'm taking my ELF Cream Eyeliner in the color Teal Tease. A thin line near the lashes will be enough just to intensify the color. Next take the same eyeliner and line the bottom.
10. Curl your lashes and use your favorite mascara!
11. Finally, I'll take my Revlon Lip Butter in Peach Parfait and put that all over my lips!
The makeup is finished! I'm not going to do a tutorial for the hair, but I will show you some looks similar to hers!
And there you have it! Look for more tribute looks coming up!
Sunday, March 25, 2012
Basic Stage Makeup Tips: A Must Know for Every Performer!

1. Remember that basic stage makeup is the makeup that goes on under any makeup needed for your character. Also, if your director tells you not to wear anything that I put below, don't wear it! This is generalized and the usual makeup worn by actresses.
2. FoCoPo
 I know, it sounds strange, but I think FoCoPo is a must have/do routine done before your other makeup. It stands for Foundation, Concealer, and Powder. As I said before, stage lights can be your worst enemy when blemishes aren't covered up enough. They bring out redness, discoloration, etc. So a good foundation, concealer and powder is absolutely necessary for looking flawless.
 3. Eyeliner & Mascara
Being washed out is another terrible deed done by stage lights. You can look sickly pale if you don't darken up areas like your eyes. A basic rule for eyeliner is to make it black. Black looks the best and darkest on stage. I like liquid eyeliners, but pencil can work just as well as long as you thicken it. And for mascara, make sure it's waterproof, because the lights can make you sweat!

Bronzers can be very tricky, especially when it comes to contouring. Unless your director tells you to, I like to skip bronzer, or else I could look suntanned or something horrendous like that. Highlighters can be tricky too. If done right, it can really make your cheeks and eyes sparkle. I like to a nice pigmented highlighter on my cheekbones and my brows and in the inner corner of my eye. I done wrong though, it can make you just look washed out. Blush is absolutely necessary for stage makeup. Without it, it can definitely make you look like a zombie. I like creme blushes for the stage, just because it's easier to touch up before going on stage.
5. Lipsticks
These can be really scary. Nudes can make you look washed out, but reds can be totally wrong for your part. Ahhh! Talk to your director, and always bring a variety with you to dress rehearsal.
6. Your Makeup Bag and Touch Ups

- Concealer & Powder
- Creme Blush
- Several different lipsticks in different shades
- Eyeliner
- Hairspray
- Bobby Pins
- Mascara
Fun Fact: Hairspray doesn't have to be used for just hair- it's great for keeping your makeup on throughout the show!
I hope this helped!
Question: Can you name the Broadway Shows shown in the pictures?
Anti-Redness Primers: A Review
Now, some of you might be like "Green? Are you serious?", especially if you haven't used a anti-redness product before. But here's why it's green: Green is opposite of red on the color wheel, so it counteracts the redness on your face.

I tried it on and immediately I noticed a change in the way my skin looked under foundation, especially after throwing on all my other face products. This primer is definitely worth the $13.
For me, I've never really needed a primer because my moisturizer clings to makeup, which is brilliant. But now that I've got this amazing primer, I'm never going back.
What primers do you use?
Saturday, March 24, 2012
Dry Brushing?
The other day I came across one of Michelle Phan's videos about her foundation routine. She talked about how she's been using her blush brush to apply her foundation and I got to thinking. Is it possible to save a few dollars by using your blush brush instead of a foundation or kabuki brush?
Yes, it is. :)
After watching her video, I sat down and took my Sonia Kashuk Blush Brush and apply the foundation. It worked seamlessly. It didn't dry out the brush, it just looked amazing when I was finished!
I've tried many different techniques for foundation. Of course, I've used foundation brushes, and starting in the middle and working my way out, patting it into my skin, etc. I'm now using this technique and I love it!
I suggest you watch this video and subscribe to Michelle, she's awesome! :)
Friday, March 23, 2012
Spring Trends: Colored Denim!
Today during social studies class my teacher gave us an article about a new fashion trend: colored denim jeans! Of course, we had to explain to him what skinny jeans were and that wedges were not the same things as wedgies, but I really got excited about this trend. His question for us was "How are these evolved in the textile industry from the first Levi Strauss pair?", but my main reaction was how cute the colors are!
I'll link the article here but seriously, these are my new obsession. My favorite celebrity who has pulled off the bright colors is Princess Kate in a beautiful coral!

I'll link the article here but seriously, these are my new obsession. My favorite celebrity who has pulled off the bright colors is Princess Kate in a beautiful coral!

(Picture from InStyle Online)
Colored denim is spring-y and great for welcoming in the cold-yet-warm days! So my question to you is: how many pairs have you got?
I really suggest that you read this article, and I'll link some sites below that carry colored denim.
There are plenty of others but I find that these are the cheapest!
-Anna :)
Wednesday, March 21, 2012
Get The Look: Taylor Swift in "Safe and Sound"
 In honor of the new Hunger Games movie coming out Friday, I'm going to do a series of tutorials relating to the series and the movie. The first is for Taylor Swift, in her new music video for "Safe and Sound", a song on the HG soundtrack. It's natural makeup, easy hair and a very, very pretty white dress.
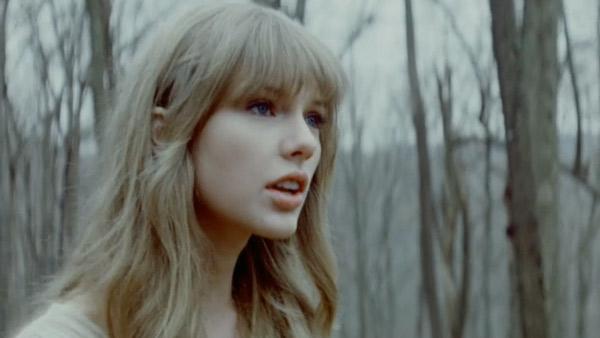
First- Makeup!
1. Start by using your everyday foundation. I'm using my N.Y.C. Fit Me Foundation in the color "Light". She has very flawless skin, especially in this music video. Now take your concealer and cover up any blemishes you have.
2. Now take a pale powder and a powder brush. I would suggest using a shade on or one shade lighter than your skin tone for a more porcelain look. Blend this all over on your face and neck.
3. Her eyes and makeup in general is just very natural, but very pretty. I'm going to start with eyes and work my way down. To me it looks like she is wearing brownish purple eyeshadow and thick eyelashes. To start creating this, I'm using my Nars Eye Primer, which is an amazing primer, even better than Urban Decay Primer Potion. Next I'm going to use my NYC Individual Eyes Compact in Smokey Browns, and take the second from the top color, which is a grayish-brown. I'm sweeping it on with a lid brush and blending out the edge with a flat topped brush. I have a swatch of the color below.

4. Now I'm going to take an angled eyeliner brush, and taking the black color in my Urban Decay Naked 2 Palette. I'm going to pat this color into a thin line right above my lashes to make them thicker. You can blend it out a little if it looks too perfect. After that I'm going to highlight under my brow and in the inner corner of my eye with the third color in in the same palette.
5. Now I'm curling my eyelashes and coating them with my ULTA Volumptious Mascara. It gives them length and volume without looking too fake. I love fake eyelashes, but I don't think it would look right with such a natural look. Taylor is probably either wearing them or her lashes are just amazing, but to keep it simple, just go with this or your favorite mascara.
6. Next I'm highlighting my cheeks with the same highlighter I used before. Next I'm taking a cream blush. I'm using my Maybelline Dream Mousse in #20 Peach Satin. I love this blush because it is super easy to blend and looks gorgeous with nude eyes and on paler and darker skin tones. I absolutely adore it.
7. Moving on to lip color, I'm using two colors: My Revlon Lip Butter in Creme Brulee and my MAC Lipstick in "Snob". First I'm coating my lips with "Snob". It's a nice, light pick with a matte look and it's very beautiful and fun to wear. Now, to put a little more "nude" into it, I'm going to put a teensy bit of the Creme Brulee Lip Butter on my finger and then just pat it into my lips and rub them together.
We are done with makeup!
Hair Time!
1. After combing out my hair, I'm going to plug in my curling iron. I have a very simple Conair Curling Iron and it works great! While it is heating up, I'm going to split my hair in half horizontally, and spray it with my Aussie Heat Protectant Spray.
2. I'm going to take sections of my hair and curl them in different sections. I'm making it loose curls, so it doesn't look too overdone. If you have bangs, leave them seperate from the rest of the hair. Once the bottom is done, let down your other hair, spray and do the same.
3. I'm plugging in my straightener and going over the curls quickly. If one looks loose enough, don't go over it. Only the tighter curls. You can also straighten your bangs.
Done!
Outfit:
I found a very nice dress from Urban Outfitters. In the video, her dress has puffy sleeves and is very long. So I found a nice, casual summer dress to make it look like Taylor's, but not floor length.
This is the back:
So pretty! Here is the link to the dress and you can check it out yourself:
I can't wait for the movie :) See you later!
-Anna <3
Subscribe to:
Comments (Atom)